- Thinkpad ロゴ直下に To interrupt normal startup, press Enter が表示されたら [F12] を押す
- Boot menu が表示される。
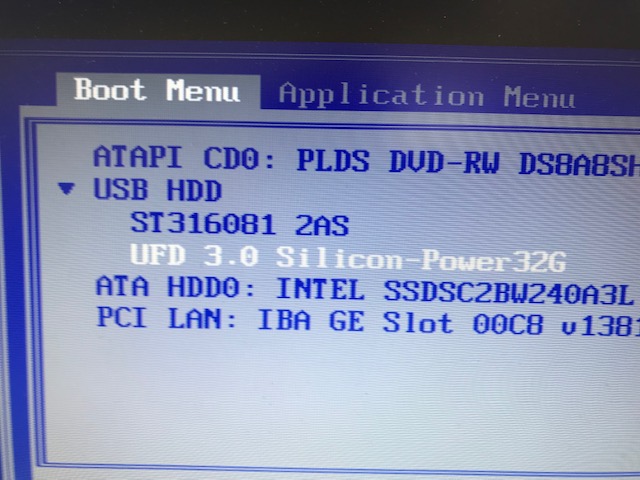
- [↑ ][↓ ]で、USB を選択(文字が白反転)
- [→ ]で、USB デバイスを展開
- 再び[↑ ][↓ ]で、UFD を選択(文字が白反転)
- [ Enter ] でブート開始
- Thinkpad ロゴ直下に To interrupt normal startup, press Enter が表示されたら
[Enter] を押しメニュー画面に切り替え- [F1] で BIOS 画面呼出
- [←][→] で [Startup] タブに切り替え
- Boot を [↑][↓] で選択し [Enter] [+],[-](日本語キーボードでは Shift + [^] ) で、以下の順にする
1. ATAPI CD0 2. USB HDD 3. ATA HDD0- [F10] で保存終了
▼
インストール先
| Figure | Comment |
|---|---|
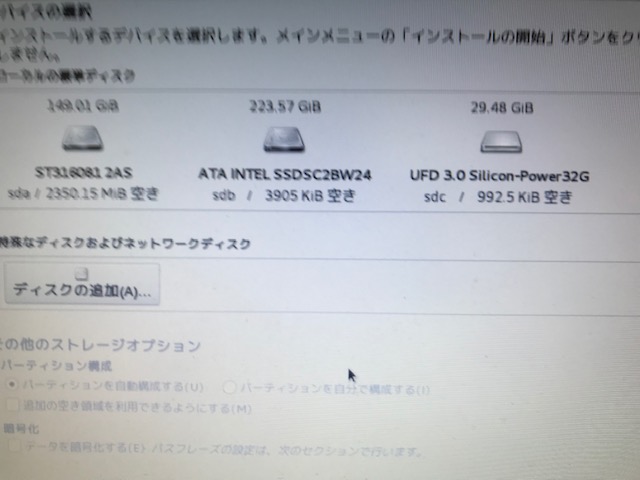 |
左から外付けHDD (sda)、内蔵SSD (sdb)、boot用USB Memory (sdc) となる。 SSD は INTEL/SAMSUNG SSD の表記がある。 |
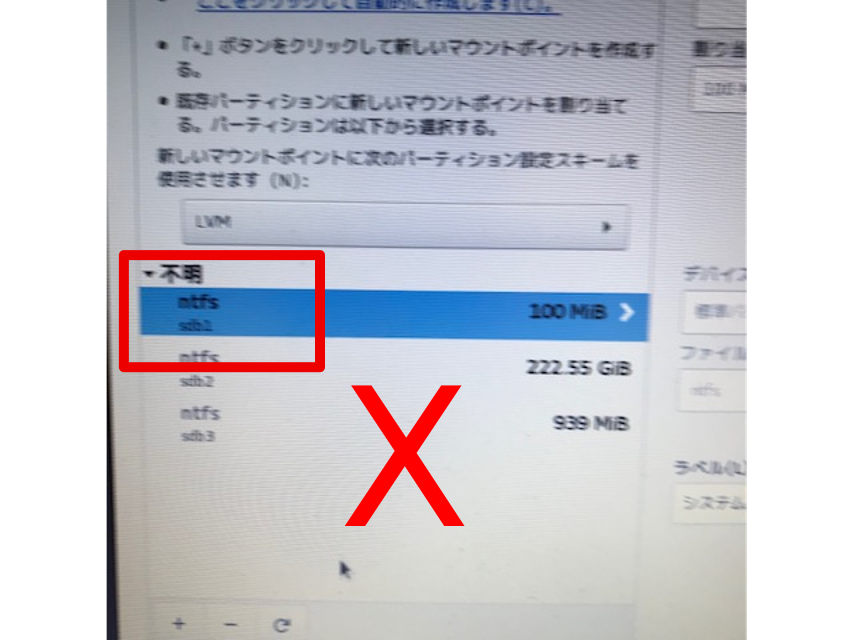 | また、パーティション作成時に、NTFS 形式であれば、内蔵SSD なので使用してはいけない。 |
 | 選択が正しい場合、Unknown Linux や CentOS Linux といった、Linux の表記がある。 |
| CentOS 7.x | CentOS 6.x | CentOS 5.x |
|---|---|---|
| systemctl start サービス | service サービス start | /etc/init.d/サービス start |
| systemctl stop サービス | service サービス stop | /etc/init.d/サービス stop |
| systemctl restart サービス | service サービス restart | /etc/init.d/サービス restart |
| systemctl status サービス | service サービス status | /etc/init.d/サービス status |
| systemctl enable サービス | chkconfig --level 2345 サービス on | |
| systemctl disable サービス | chkconfig --level 2345 サービス off | |
| systemctl list-unit-files --type service | chkconfig --list | |
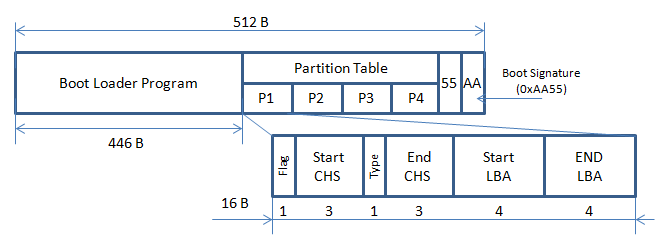
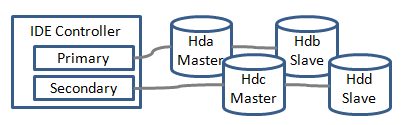 | プライマリ・マスタのパーティション1 = /dev/hda1 セカンダリ・スレーブの拡張パーティション1 = /dev/hdd5 |
以下はシンボリックリンク